Setup Raspberry Pi zero W and run python scripts and servers
What is Raspberry Pi Zero w
- It is a like small pocket CPU that can connect to WiFi. It has GPIO pins, USB, HDMI connectors
- Using WiFi, the Raspberry pi zero w can wirelessly connect to a network
- Raspberry Pi has an SD card that acts as a hard disk for the OS
- The GPIO pins can be used to control the pin voltage or read the input signals (like sensors data) by the applications running on Raspberry Pi
- The USB and HDMI connectors can be used to connect keyboard, mouse, monitor to the Raspberry Pi for the desktop interface

Raspberry Pi OS Vs Raspberry Pi OS Lite Operating systems
- The Lite version is a command line based OS and does not have a desktop user interface
- The Lite version is ideal if the Raspberry Pi is accessed only through SSH
- All the Raspberry Pi OS versions can be downloaded from https://www.raspberrypi.com/software/operating-systems/
Install Raspberry Pi OS Lite on the SD Card
- The OS can be flashed on the SD card using the Raspberry Pi Imager software
- Download and install the Raspberry Pi Imager software from https://www.raspberrypi.com/software/
- Plug in the Raspberry Pi’s SD card into the computer using an SD card reader. Format the SD card.

- Open the Raspberry Pi imager and select the Raspberry Pi device type, OS and SD card as shown below and click Next
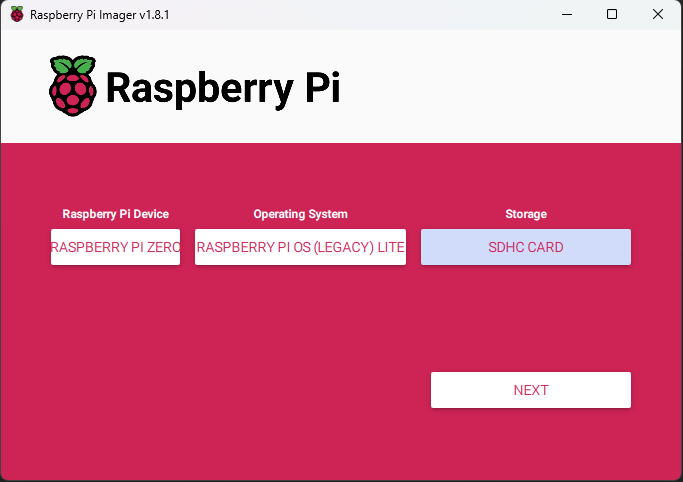
- Click on the Edit settings button to edit OS configuration before flashing into the SD card
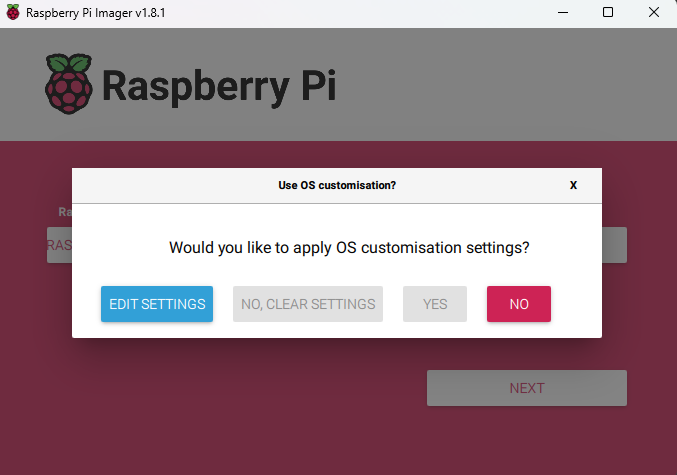
- In the settings window, enter the WiFi details, username and password for Raspberry Pi OS, enable SSH as shown below. Note that Raspberry pi does not connect to _5G WiFi network

- After entering the OS settings, proceed to boot the OS into the SD card
- Now eject the SD card from PC and insert the SD card onto the Raspberry Pi
- Power on the Raspberry Pi using the USB port. Now Raspberry pi will boot from the OS present in SD card
Connect to Raspberry Pi using “ssh” command
- Open a command line in a computer present in the same WiFi network as Raspberry Pi
- Run the command
ssh raspcpu@awesomepi.localto ssh into raspberry pi. The format of the connection string is @ - Now we can run commands, edit files in raspberry pi through the remote ssh shell

Copy files to raspberry pi using “scp” command
- scp command can be used to copy files to raspberry pi through command line using an ssh connection
- The following command copies a single file
report_icon.pngfrom PC toimagesfolder of raspberry pi assome_file.png
scp C:\\Users\\James\\Downloads\\report_icon.png raspcpu@awesomepi.local:images/some_file.png

- The following command copies the PC folder named
datato raspberry pi folder nameddata_dir
scp -r C:\\Users\\James\\Downloads\\data raspcpu@awesomepi.local:data_dir/

Copy files to raspberry pi using WinSCP
- WinSCP application provides a convenient user interface to copy or edit files in Raspberry pi
- Install and open WinSCP
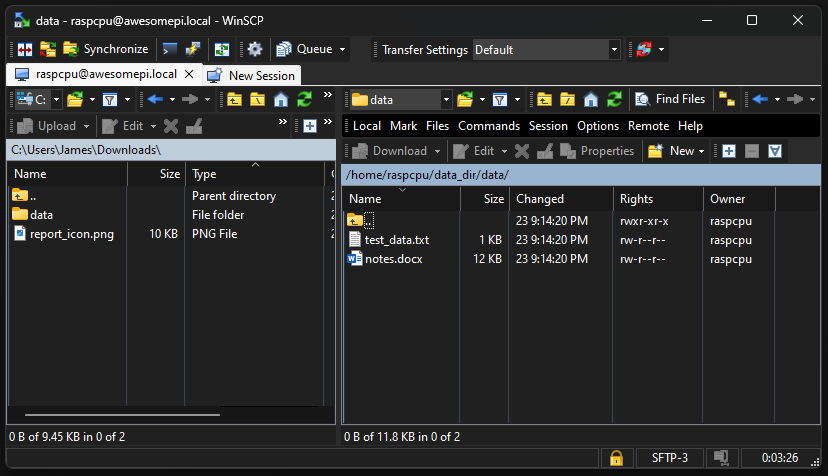
- Create a new session by providing the hostname, port (port 22) and the credentials of Raspberry pi as shown below

- Now the files in Raspberry pi can be managed and edited with a file explorer like user interface
Install software in Raspberry Pi
- Since Raspberry Pi OS is a debain based OS, installing software is the same like in Ubuntu
- Access the terminal of Raspberry Pi using SSH
- Update all the packages using
sudo apt update && sudo apt upgrade - Install a package, for example nginx using
sudo apt install ngnix
Use python in Raspberry Pi
- Update only python using
sudo apt upgrade python3 - Install pip for python packages management using
sudo apt install python3-pip. Now python packages, for example Flask can be installed usingpython3 -m pip install flask - Install venv for python virtual environments using
sudo apt install python3-venv. Now a virtual environment can be created using the commandpython3 -m venv app_env - Custom version of python can be installed using deadsnakes ppa. Commands below can be used to install python 3.7
# Add deadsnakes ppa repository once
sudo add-apt-repository ppa:deadsnakes/ppa
# install python 3.7
sudo apt install python3.7
sudo apt install python3.7-distutils
- Now python 3.7 can be used like in the below example
# get the version info
python3.7 --version

# run a python script with python 3.7 version
python3.7 hello.py

# install a python module in python 3.7
python3.7 -m pip install flask
Run a python flask web server in Raspberry Pi
- Install flask python module with the command
python3 -m pip install flask - Create a python file for the flask server in Raspberry Pi. The below example file
demo_server.pycan be run as a flask web server listening on port 50100
# demo_server.py
from flask import Flask

# create a flask server
app = Flask(__name__)

# just return 'Hello World!' text when the route '/' is called
@app.route('/')
def index():
    return 'Hello, World!'

# __name__ will be __main__ only if this file is the entry point
if __name__ == '__main__':
    # run the server on this ip and port 50100
    app.run(host='0.0.0.0', port=50100, debug=True)
- Run the flask server with the command
python3 demo_server.py. But the server will stop when the terminal is closed - Server can be run as a background service as shown below. The
&at the end of the command makes the script to run in the background.nohupmakes the script to ignore the hang up signal when the terminal is closed. The command line outputs will be saved in a fileoutput.log
cd /path/to/server_folder
nohup python3 demo_server.py > output.log &
- Run the below command if command line output file is not required
cd /path/to/server_folder
nohup python3 demo_server.py > /dev/null 2>&1 &
- Now the flask server will run even if the terminal is closed
- To stop the flask server, the process ID is required. Process ID can be seen using the command
ps aux | grep demo_server.py. Now stop the server using the commandkill <process_id>
Run periodic scripts in Raspberry Pi using cron
cronjobs can be used to schedule the periodic execution of scripts- A cron job can be expressed using the syntax
<minute> <hour> <day_of_month> <month> <day_of_week> <command> - Following are some of the examples for cron job syntax
- Cron jobs can be registered in a crontab file. The file can be edited using the command
crontab -e. The required jobs can be written in this crontab file
Video
The video tutorial for this post can be found here
References
- Raspberry Pi docs - https://www.raspberrypi.com/documentation/
- Use nohup without generating output file - https://stackoverflow.com/a/10708326/2746323
Comments
Post a Comment