Customize Keycloak appearance with themes
- Themes can be used to change the look of Keycloak pages.
- The built-in themes of keycloak can be extended to just modify the required elements of built-in theme. For example we can change the logo, colors, text etc.
- If a independent new theme from scratch is required to be developed, it can be extended from the in-built ‘base’ theme of Keycloak.
- If just minor tweaks are intended to be done, the new theme can be extended from the existing keycloak theme.
Parts of a theme
- A theme can have 4 parts: Login, Account, Admin, Email for customization of login page, account page, admin page and email content respectively
Change Theme in Keycloak
- In the Keycloak admin console, go to Realm settings and select the “Themes” tab.
- Here the theme for login, account, admin and email can be changed.

Create a Keycloak theme
- In the keycloak installation folder, go to themes folder and create a new folder with the theme name.
- For example, to create a new theme named “acme”, create a new folder named “acme” in the themes folder of Keycloak folder.
Anatomy of a new theme folder
- Inside the new theme folder there can be one or more folders named ‘login’, ‘admin’, ‘account’, ‘email’.
- The theme for the respective parts can be defined in these folders.
- In this new ‘acme’ theme example, we will create folders for login admin and account.
- The final folder structure of this example would be as follows
    acme
    ├───account
    │   │   theme.properties
    │   │
    │   └───resources
    │       │   favicon.svg
    │       │   logo.svg
    │       │
    │       └───css
    │               styles.css
    │
    ├───admin
    │   │   theme.properties
    │   │
    │   └───resources
    │       │   favicon.svg
    │       │   logo.svg
    │       │
    │       └───css
    │               styles.css
    │
    └───login
        │   theme.properties
        │
        ├───messages
        │       messages_en.properties
        │
        └───resources
            ├───css
            │       styles.css
            │
            └───img
                    favicon.ico
                    keycloak-bg.png
                    keycloak-logo-text.png
theme.properties file
- This file defines the theme type
- The
theme.propertiesfile of login folder of acme theme in this example is as follows
parent=keycloak
import=common/keycloak

styles=css/login.css css/styles.css
parentmeans the parent theme from which the theme is being extended from.importis used to define the parent theme folder to import resources from.stylesis used to define the css files to be used in the theme. Note that we have defined only styles.css file. But we need to also mention the css file path being used in parent theme also. Hence the value ofstylesis kept ascss/login.css css/styles.css. Multiple css file paths should be separated by a space and the order should start from parent files to child files since the file paths in the right override the file paths in the left.scripts- JavaScript files can also be added to theme usingscript. This can be used add additional JavaScript code to browser
View existing keycloak themes for inspiration
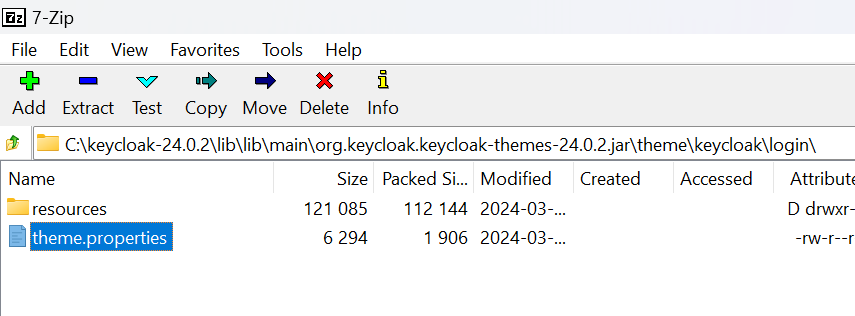
- In the lib\lib\main\ folder of keycloak installation folder, keycloak theme jar files can be found.
- Use a tool like 7zip or winrar to see the files inside the jar file.
- In the jar file with name like
org.keycloak.keycloak-themes-24.0.2.jar, the login and email theme files of “keycloak” and the “base” theme can be found. These themes can be used to extend the login and email theme types in the new theme. - In the jar file with name like
org.keycloak.keycloak-admin-ui-24.0.2.jar, the admin theme files of “keycloak-v2” theme can be found. - In the jar file with name like
org.keycloak.keycloak-account-ui-24.0.2.jar, the account theme files of “keycloak-v3” theme can be found.
Customize login screen

- In the new theme (acme) folder create, a new folder named
login. This will define the login screen of the theme - Create a file named
theme.propertiesin the login folder as shown below
# login/theme.properties file
parent=keycloak
import=common/keycloak

styles=css/login.css css/styles.css
- The default theme used for login is
keycloak. Hence we are extending thekeycloaktheme usingparent=keycloak. - The files for the keycloak theme can be found in the path “ib\lib\main\org.keycloak.keycloak-themes-24.0.2.jar\theme\keycloak\login” folder as shown below. Use 7zip or winrar to see the files within the jar file.
Change heading
- By inspecting the login.ftl file of
basekeycloak theme, it is found that the the login page heading is set by the variableloginAccountTitle

- Create a
messagesfolder in the login folder and create a file namedmessages_en.propertiesas shown below
loginAccountTitle=Let us go
- Now we have overwritten the login page heading using a messages variable
Change background, favicon and logo
- Create a folder named
resourcesin the login folder of the theme. Create a folder namedimg. - Upon inspecting the html page source code of Keycloak login screen, it can be seen that the favicon is loaded from the path
img/favicon.ico. - By seeing the image URLs of login page logo and background, it can be understood that the logo file can be overwritten using the
img/keycloak-logo-text.pngfile and the background image can be overwritten using theimg/keycloak-bg.pngfile

Change the colors

- Upon inspecting the
keycloaklogin theme, it can be found that the css styles are defined in theresources/css/login.cssfile - To add new additional styling over the existing style, create a new file named styles.css and decalre in the theme.properties file like
styles=login.css styles.css. This means that the style login.css of the parent theme is used over which the styles.css will be overwritten. - The css classes of the login screen can be used in the styles.css to change the colors as shown below
/* login/resources/css/styles.css */
.card-pf {
    border-color: var(--pf-global--palette--purple-600);
}

#kc-login {
    background-color: var(--pf-global--palette--purple-600);
}

#kc-login:hover {
    background-color: var(--pf-global--palette--purple-700);
}
- This approach requires overriding a lot of style classes to acheive required color scheme.
- Instead css variables can be overwritten to easily achieve required colors in very less lines of css. This is because the keycloak theme uses apache patternfly css framework under the hood which uses css variables to use a color palette in page.
- As shown below instead of explicitly overriding the styles of css classes, only the css variables can be changes to modify the colors in the page as shown below
/* login/resources/css/styles.css */

/* Override global primary color 100 and 200*/
:root {
    --pf-global--primary-color--100: var(--pf-global--palette--purple-600);
    --pf-global--primary-color--200: var(--pf-global--palette--purple-700);
}
Customize account screen

- The default keycloak account theme files can be seen in the “lib\lib\main\org.keycloak.keycloak-account-ui-24.0.2.jar\theme\keycloak.v3\account” folder of the keycloak folder. Use 7zip or winrar to view the files inside jar file.
- Create a folder named account in the new theme (acme) folder and create a
theme.propertiesfile as shown below.
# account/theme.properties file
parent=keycloak.v3
import=common/keycloak
styles=css/styles.css
Change favicon and menu logo
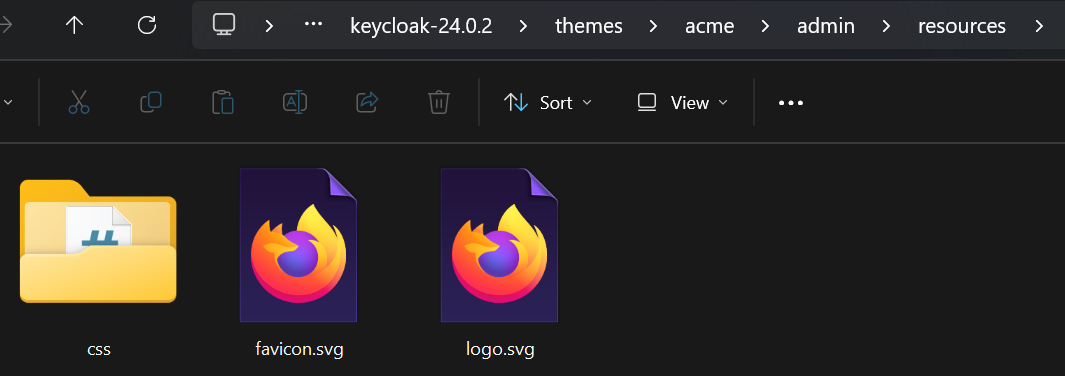
- Upon inspecting the HTML page source and the image URL in the account screen, it can be seen that the favicon can be overwritten with
resources/favicon.svgand menu logo can be overwritten withresources/logo.svg

Change the colors
- Create a new file named
styles.cssin theaccount/resources/cssfolder and link it in thetheme.propertiesfile usingstyles=css/styles.css - Inspect the account page HTML code and override the desired css variables as shown below to change the page colors
/* account/resources/css/styles.css file */
/* Override global colors */
:root {
  --pf-global--primary-color--100: var(--pf-global--palette--purple-600);
  --pf-global--primary-color--200: var(--pf-global--palette--purple-700);
  --pf-global--active-color--100: var(--pf-global--palette--purple-600);
  --pf-global--BackgroundColor--dark-300: #606C38;
  --pf-global--BackgroundColor--dark-100: #283618
}
Customize the admin screen

- The default keycloak admin theme files can be seen in the “lib\lib\main\org.keycloak.keycloak-admin-ui-24.0.2.jar\theme\keycloak.v2\admin” folder of the keycloak folder. Use 7zip or winrar to view the files inside jar file.
- Create a folder named admin in the new theme (acme) folder and create a
theme.propertiesfile as shown below.
# admin/theme.properties file
parent=keycloak.v2
import=common/keycloak
styles=css/styles.css
Change favicon and menu logo
- Upon inspecting the HTML page source and the image URL in the admin screen, it can be seen that the favicon can be overwritten with
resources/favicon.svgand menu logo can be overwritten withresources/logo.svg
Change the colors
- Create a new file named
styles.cssin theadmin/resources/cssfolder and link it in thetheme.propertiesfile usingstyles=css/styles.css - Inspect the admin page HTML code and override the desired css variables as shown below to change the page colors
/* admin/resources/css/styles.css file */
/* Override global colors */
:root {
  --pf-global--primary-color--100: var(--pf-global--palette--purple-600);
  --pf-global--primary-color--200: var(--pf-global--palette--purple-700);
  --pf-global--active-color--100: var(--pf-global--palette--purple-600);
  --pf-global--BackgroundColor--dark-300: #606C38;
  --pf-global--BackgroundColor--dark-100: #283618;
}
Video
You can see the video for this post here
References
- Official documentation on Keycloak themes - https://www.keycloak.org/docs/24.0.2/server_development/#_themes
- https://www.mastertheboss.com/keycloak/how-to-create-a-custom-keycloak-theme/
This was incredibly helpful. Thanks so much!
ReplyDelete